はじめに
皆さん、
近年、
ここで、
- ユニットテスト・
単体テスト - 結合テスト・
システムテスト - 総合テスト
- 受け入れテスト
- 負荷テスト
- セキュリティテスト
筆者の経験上、
また、
さらに、
近年では、
テストを自動化することで、
さて、
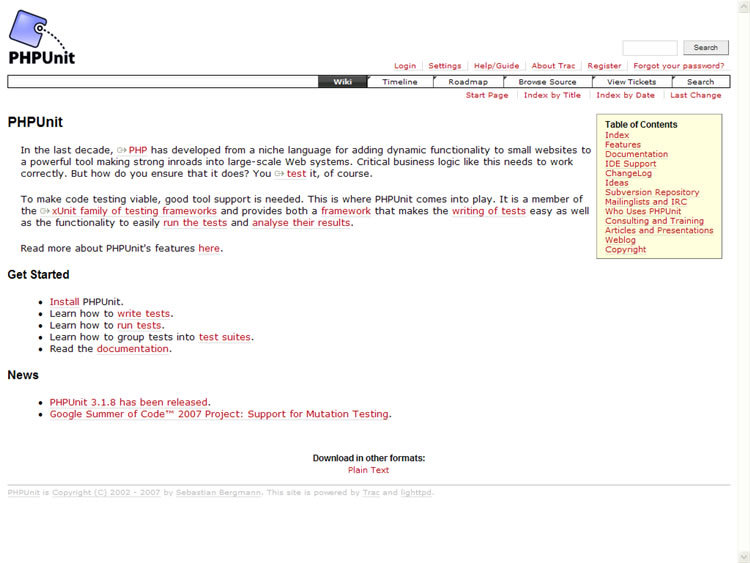
PHPUnitとは
すでによく知っている・
2007年8月15日現在、
最新系列のPHPUnit3.
- コマンドラインのテストランナー
- TestSuiteのサポート
- 拡張TestCase
- モックオブジェクトのサポート
- コードカバレッジ解析
(Xdebugが必須) - 様々なフォーマットでのログ出力
(XML、 JSON、 Test Anything Protocol (TAP)、 GraphViz) - テストコードの雛形ジェネレータ
本連載では、
使用する環境
本連載の動作確認に使用した環境は、
--with-apxs2=/usr/local/apache2/bin/apxs \
--prefix=/usr/local/lib/php5 \
--with-pear=/usr/local/lib/php5/pear \
--with-config-file-path=/usr/local/lib/php5/ini/5.2.3 \
--with-config-file-scan-dir=/usr/local/lib/php5/ini.d \
--enable-zend-multibyte \
--enable-mbstring=shared \
--with-dom \
--enable-filter=shared \
--with-gettext=shared \
--with-mcrypt=shared \
--with-gd=shared \
--with-jpeg-dir \
--with-png-dir \
--with-zlib-dir \
--with-ttf \
--with-freetype-dir \
--enable-gd-native-ttf \
--enable-gd-jis-conv \
--enable-soap=shared \
--enable-pdo=shared \
--with-pdo-sqlite=shared \
--with-sqlite=shared \
--enable-sqlite-utf8 \
--with-openssl=shared \
--with-curl=shared \
--enable-bcmath=shared \
--enable-pcntl=shared \
--enable-sockets=shared \
--with-oci8=shared,/usr/lib/oracle/xe/app/oracle/product/10.2.0/server/ \
--with-pdo-oci=shared,/usr/lib/oracle/xe/app/oracle/product/10.2.0/server/ \
--with-pdo=shared \
--enable-sigchild \
--with-xsl=shared \
--enable-zip=shared
「--prefix」
PHPUnitのインストール
PHPUnitのサイトに掲載されている手順でインストールします。pearコマンドを使用する場合は、
$ sudo pear channel-discover pear.phpunit.de
$ sudo pear install -a phpunit/PHPUnit
インストール後、
$ export PATH=$PATH:/usr/local/lib/php5/bin/
$ which phpunit
/usr/local/lib/php5/bin/phpunit
$ ls /usr/local/lib/php5/bin/phpunit
/usr/local/lib/php5/bin/phpunit
$ phpunit --help
PHPUnit 3.1.7 by Sebastian Bergmann.

Usage: phpunit [switches] UnitTest [UnitTest.php]

  --log-graphviz <file>  Log test execution in GraphViz markup.
  --log-json <file>      Log test execution in JSON format.
  --log-tap <file>       Log test execution in TAP format to file.
  --log-xml <file>       Log test execution in XML format to file.

  --test-db-dsn <dsn>    DSN for the test database.
  --test-db-log-rev <r>  Revision information for database logging.
  --test-db-log-info ... Additional information for database logging.

  --testdox-html <file>  Write agile documentation in HTML format to file.
  --testdox-text <file>  Write agile documentation in Text format to file.

  --filter <pattern>     Filter which tests to run.
  --loader <loader>      TestSuiteLoader implementation to use.
  --repeat <times>       Runs the test(s) repeatedly.

  --tap                  Report test execution progress in TAP format.
  --testdox              Report test execution progress in TestDox format.

  --no-syntax-check      Disable syntax check of test source files.
  --stop-on-failure      Stop execution upon first error or failure.
  --verbose              Output more verbose information.
  --wait                 Waits for a keystroke after each test.

  --skeleton             Generate skeleton UnitTest class for Unit in Unit.php.
  --help                 Prints this usage information.
  --version              Prints the version and exits.

  --d key[=value]         Sets a php.ini value.
$
次は、
PHPUnitの基本的な使い方
xUnitはテスティング
クラス名.php
とします。以下は、
<?php
require_once 'PHPUnit/Framework.php';

class ArrayTest extends PHPUnit_Framework_TestCase
{
    public function testNewArrayIsEmpty()
    {
        // 配列を作成します。
        $fixture = array();

        // 配列のサイズは 0 です。
        $this->assertEquals(0, sizeof($fixture));
    }

    /**
     * メソッド名がtestで始まっていないが、「@test」
     * アノテーションを使用していることに注意
     *
     * @test
     */
    public function arrayContainsAnElementTest()
    {
        // 配列を作成します。
        $fixture = array();

        // 配列にひとつの要素を追加します。
        $fixture[] = 'Element';

        // 配列のサイズは 1 です。
        $this->assertEquals(1, sizeof($fixture));
    }
}
ここでは2つのテストメソッド
- testNewArrayIsEmpty
- testArrayContainsAnElement
が用意されていますが、
- テストしたいコードを実行
- assertEqualsメソッドを実行
といった処理を実行していることが分かると思います。2番目のassertEqualsメソッドでテストした結果を検証しているメソッドで、
assertEqualsの他にもassertXXXXメソッドが多く用意されています。以下に主なassertXXXXメソッドを挙げておきます。その他のassertXXXXメソッドについては、
| アサーション | 意味 |
|---|---|
| void assertTrue(bool $condition) | $condition が FALSE の場合にエラーを報告します。 |
| void assertTrue(bool $condition, string $message) | $condition が FALSE の場合にエラー $message を報告します。 |
| void assertFalse(bool $condition) | $condition が TRUE の場合にエラーを報告します。 |
| void assertFalse(bool $condition, string $message) | $condition が TRUE の場合にエラー $message を報告します。 |
| void assertNull(mixed $variable) | $variable が NULL でないときにエラーを報告します。 |
| void assertNull(mixed $variable, string $message) | $variable が NULL でないときにエラー $message を報告します。 |
| void assertNotNull(mixed $variable) | $variable が NULL の場合にエラーを報告します。 |
| void assertNotNull(mixed $variable, string $message) | $variable が NULL の場合にエラー $message を報告します。 |
| void assertEquals(string $expected, string $actual) | 2 つの文字列 $expected と $actual が等しくない場合にエラーを報告します。エラーは、 |
| void assertEquals(string $expected, string $actual, string $message) | 2 つの文字列 $expected と $actual が等しくない場合にエラー $message を報告します。エラーは、 |
| void assertNotEquals(string $expected, string $actual) | 2 つの文字列 $expected と $actual が等しい場合にエラーを報告します。 |
| void assertNotEquals(string $expected, string $actual, string $message) | 2 つの文字列 $expected と $actual が等しい場合にエラー $message を報告します。 |
| void assertEquals(mixed $expected, mixed $actual) | 2 つの変数 $expected と $actual が等しくない場合にエラーを報告します。 |
| void assertEquals(mixed $expected, mixed $actual, string $message) | 2 つの変数 $expected と $actual が等しくない場合にエラー $message を報告します。 |
| void assertNotEquals(mixed $expected, mixed $actual) | 2 つの変数 $expected と $actual が等しい場合にエラーを報告します。 |
| void assertNotEquals(mixed $expected, mixed $actual, string $message) | 2 つの変数 $expected と $actual が等しい場合にエラー $message を報告します。 |
それでは、
$ phpunit ArrayTest
PHPUnit 3.1.7 by Sebastian Bergmann.

..

Time: 0 seconds


OK (2 tests)
$
また、
$ phpunit ArrayTest TestSample.php
PHPUnit 3.1.7 by Sebastian Bergmann.

..

Time: 0 seconds


OK (2 tests)
$
テスト結果を見ると
$ phpunit ArrayTest
PHPUnit 3.1.7 by Sebastian Bergmann.

F.

Time: 0 seconds

There was 1 failure:

1) testNewArrayIsEmpty(ArrayTest)
Failed asserting that <integer:0> matches expected value <integer:1>.
/home/shimooka/public_html/gihyo.jp/01.phpunit/04/ArrayTest.php:12

FAILURES!
Tests: 2, Failures: 1.
$
テストの実行結果をまとめると、
| 表示 | 意味 |
|---|---|
| . | テストが成功した |
| F | テストに失敗した |
| E | テストの実行中、 |
| S | テストがスキップされた |
| I | テストが |
実際にテストを書く際のポイント
先の例は、
- テスト対象の仕様を明確にしておく
テストケースを書くためには、
仕様を明確にしておく必要があります。なぜなら、 「どういうテストをすればよいか」 を決めるためには、 「それがどのように動作するか」 を決めておく必要があるためです。つまり、 「テストを書くために、 仕様を明確にする」 とも言えます。また、 不足している仕様があぶり出される、 という効果もあります。 - 最初にテストが失敗することを確認しておく
先にテストを作成する場合、
テスト対象の実装前にテストが失敗する事を確認しておきましょう。実装後、 テストが成功したとしても、 最初からテストが成功していたのであれば、 その結果は疑わしいものになってしまいます。必ず、 「テストに失敗していたが、 実装することでテストに成功するようになった」 と言えるようでなければいけません。 - 「まずは」
テストをパスさせ、 テストと実装を交互に繰り返す 実際には、
テストケースやテスト対象のクラス・ 関数を、 最初から完全に実装することは難しい場合が多いです。気負わずにまずはテストをパスするだけのシンプルな実装から始めましょう。そして、 「テスト作成/実装/テスト」 を繰り返し、 実装をブラッシュアップさせます。そうすることで、 最終的な実装もシンプルになります。 - テスト対象の大きさや責務
テスト対象が大きくなったり多くの機能を持っている場合、
テストケースが書きにくくなったり複雑になったりしてしまいます。明確にする仕様の 「粒度」 にも気を配りましょう。XPやTDDなどテストが優先される開発手法の場合、 テストケースの粒度に合わせて実装が行われますので、 自然と適切な粒度になる場合が多くなります。
次回から数回にわたって、


