最終回となる今回は、
OAuth Service Providerがすべきこと
OAuth連載最終回は、
- OAuth Consumerの管理
- OAuth Request / Access Tokenの管理
- OAuth経由のリソースへのアクセス管理
Rails OAuth Pluginを用いたOAuth Service Providerの実装
Railsではruby-oauth gemとOAuth Pluginを用いることで、
gem install oauthrails service_provider
cd service_provider
./script/plugin install git://github.com/pelle/oauth-plugin.git./script/generate oauth_providerこれで以下のContorollerおよびModelが生成されます。
app/controllers/oauth_controller.rb
app/models/oautht_token.rb
app/models/access_token.rb
app/models/request_token.rb
app/models/client_application.rb
app/models/oauth_nonce.rb
最後にroutesとassociationを設定して、
map.oauth '/oauth',:controller=>'oauth',:action=>'index'
map.authorize '/oauth/authorize',:controller=>'oauth',:action=>'authorize'
map.request_token '/oauth/request_token',:controller=>'oauth',:action=>'request_token'
map.access_token '/oauth/access_token',:controller=>'oauth',:action=>'access_token'
map.test_request '/oauth/test_request',:controller=>'oauth',:action=>'test_request'has_many :client_applications
has_many :tokens, :class_name=>"OauthToken",:order=>"authorized_at desc",:include=>[:client_application]rake db:migrateここまでで前述のService Providerに
before_filter :login_or_oauth_required
before_filter :oauth_requiredなおService Provider Sample - githubにもこれと同様のサンプルアプリケーションを公開していますので、

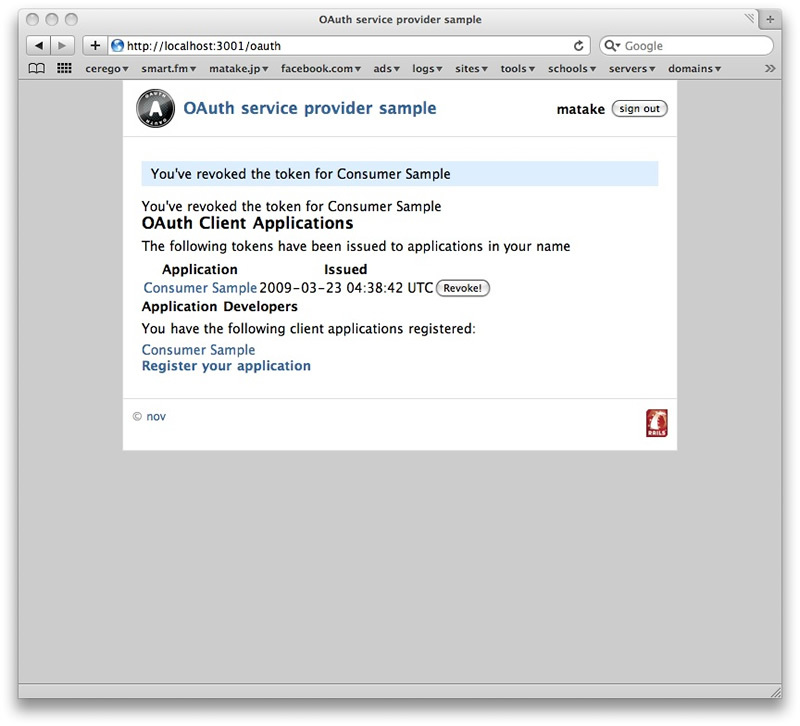
OAuth Consumerからアクセスする
前回までで実装したConsumerから、
Service Providerを起動し、
cd oauth_sample/oauth_service_provider
./script/server -p 3001
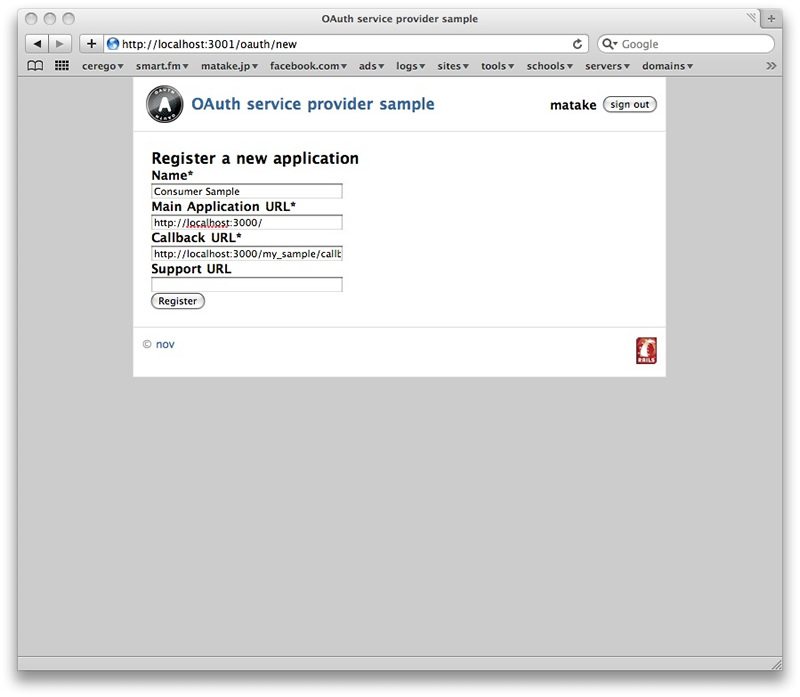
ログイン

Application URLとCallbackは、
Application URL : http://localhost:3000
Callback URL : http://localhost:3000/my_sample/callback
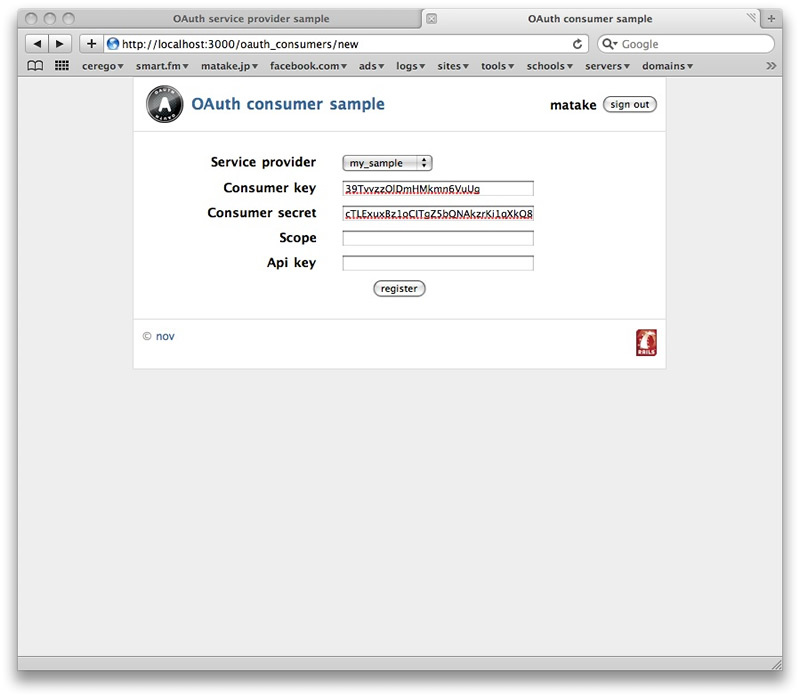
次に得られたConsumer KeyとConsumer SecretをConsumer Sampleアプリケーションに登録します。まずはOAuth Consumer Sampleのconfig/
my_sample:
  name: my sample
  site: http://localhost:3001
  request_token_url: http://localhost:3001/oauth/request_token
  authorize_url: http://localhost:3001/oauth/authorize
access_token_url: http://localhost:3001/oauth/access_tokencd oautht_sample/oauth_consumer
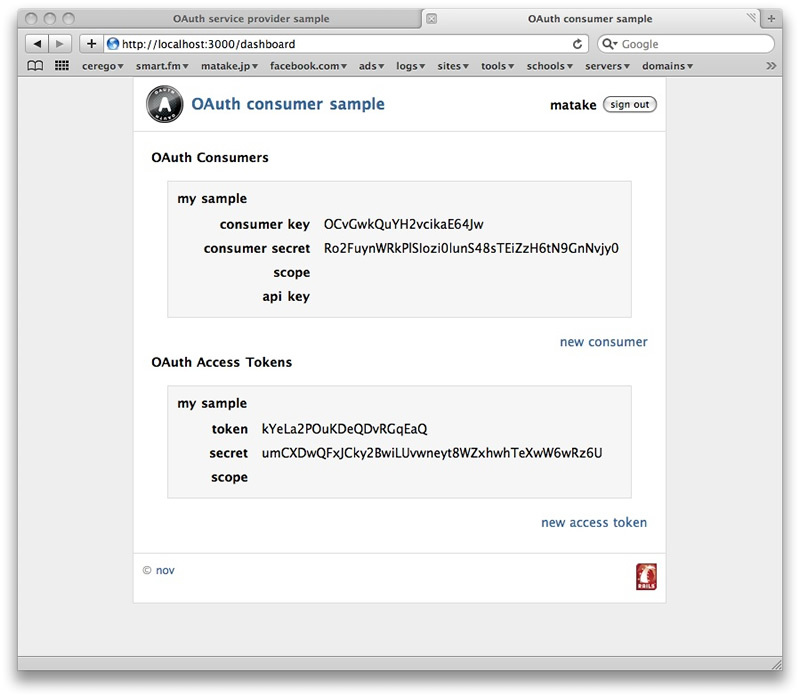
./script/serverConsumer SampleにログインしてConsumer KeyとConsumer Secretを入力し、

最後に

OAuth Pluginの改善点
残念ながら、
- OAuth Consumerの削除
(および編集) - OAuth Token一覧ページとOAutht Consumer一覧ページの分離
またデフォルトではTokenの有効期限やscopeはサポートされていないため、
(補足)OAuth Signature
Service Providerでは、
参考:OAuth Core 1.
-
リクエストパラメータを集める。
・HTTP Authorization headerに含まれるパラメータを集める (realmを除く)。
・HTTP POSTリクエストに含まれるパラメータを集める。
・HTTP GETリクエストに含まれるパラメータを集める。 集めたパラメータからoauth_
signatureを取り除く。 パラメータをkeyの辞書順にソートする。同じkeyが複数含まれる場合は、
それらをvalueの辞書順でソートする。 “key1=value1&key2=value2” のようにパラメータを連結する。valueが空の場合は"key="とする。 リクエストURLを取得する。fragmentとqueryおよびデフォルトPort
(80 for http、 443 for https) は取り除き、 schemeとdomainは小文字にすること。 - HTTP method
(大文字、 HEAD or GET or POST) とリクエストURL、 および正規化されたパラメータをそれぞれURLエンコード (UTF-8) した後 “&” で連結する。
Signature Base String生成後は、
なおSignature Base StringにはリクエストURLが含まれるので、
最後に
この連載では、
また先日TwitterのOAuthもpublic betaとして
最後に、


